For this project I used:
- Paintshop Pro
- Cricut Maker
- Design Space
- A piece of finished walnut wood just slightly bigger than 8″ by 10″
- 8″ by 10″ frame
- White vinyl
- P
olyurethane
(Note: These are the computer programs and materials I used, but you may have different tools available to you that will work just as well!)
–
Last Christmas, I knew exactly what I wanted to give my mother-in-law, but I struggled to figure out how to make it happen. You see, there is this particular recipe that she’s mentioned many times over the years since I’ve been a part of this family – her mother’s Angel Food Cake. Now cake baking, in general, has never been my strong suit, let alone an angel food sponge cake. But my mother-in-law spoke fondly of this cake often and I thought what better Christmas gift could we give her, than that beloved cake? But it wasn’t just the cake that I wanted to give to her. I wanted to somehow create a sweet keepsake of the recipe – and I especially wanted it to be in her mother’s handwriting. How special would that be? But how do you turn an old recipe card into a keepsake? Well, we figured it out, and here is the result.
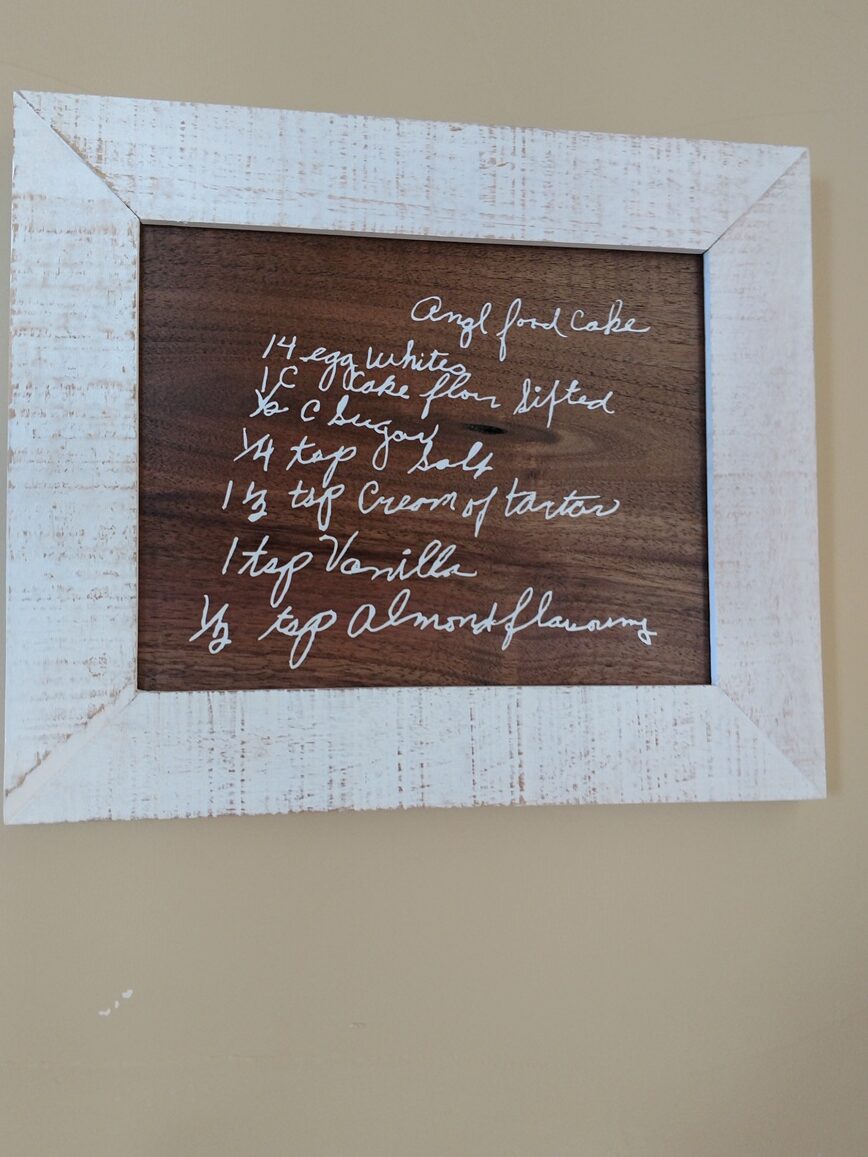
So I very casually (at least I tried) asked her for a copy of her mom’s angel food cake recipe and then held my breath. I crossed my fingers hoping that she would send me a picture of the recipe, and not just a version that she typed up for me. If she ended up not sending me a picture of the actual recipe, I would be back at step one and would have to try to figure out another way to get a copy of the recipe. Although I knew where my mother-in-law kept her recipes, it was quite a big box of different recipes and I would have felt like a sneak trying to rifle through her things to find it. Thankfully, a few moments after I texted her, I received a reply back with a picture of the front of the recipe card. Whew!
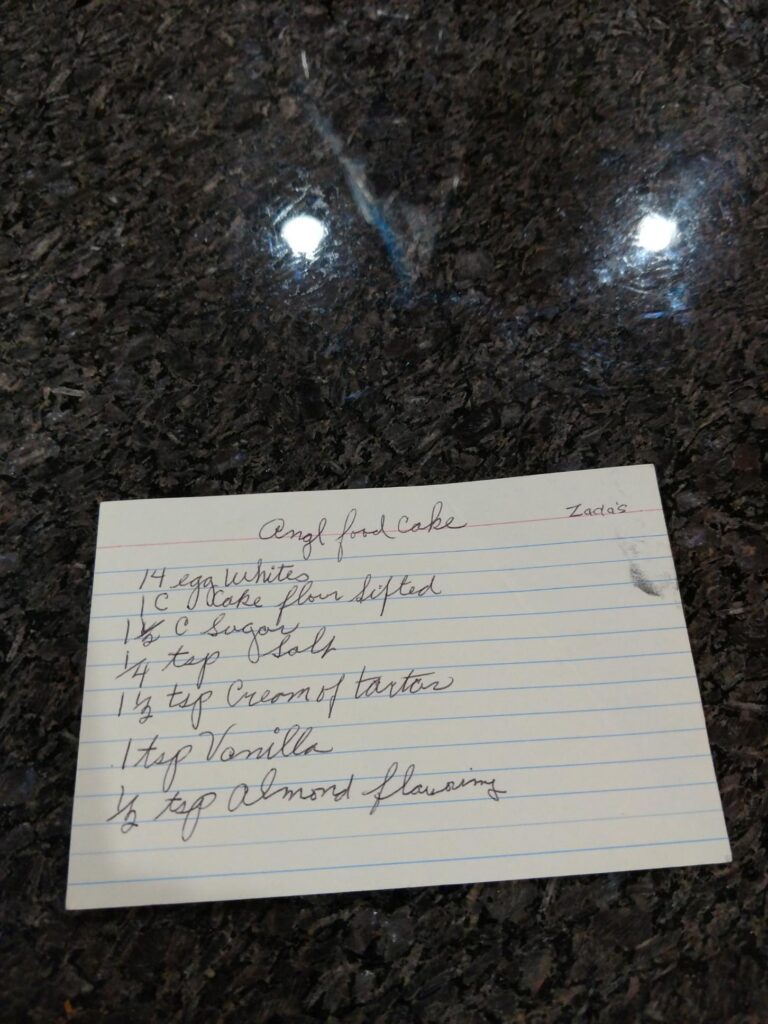
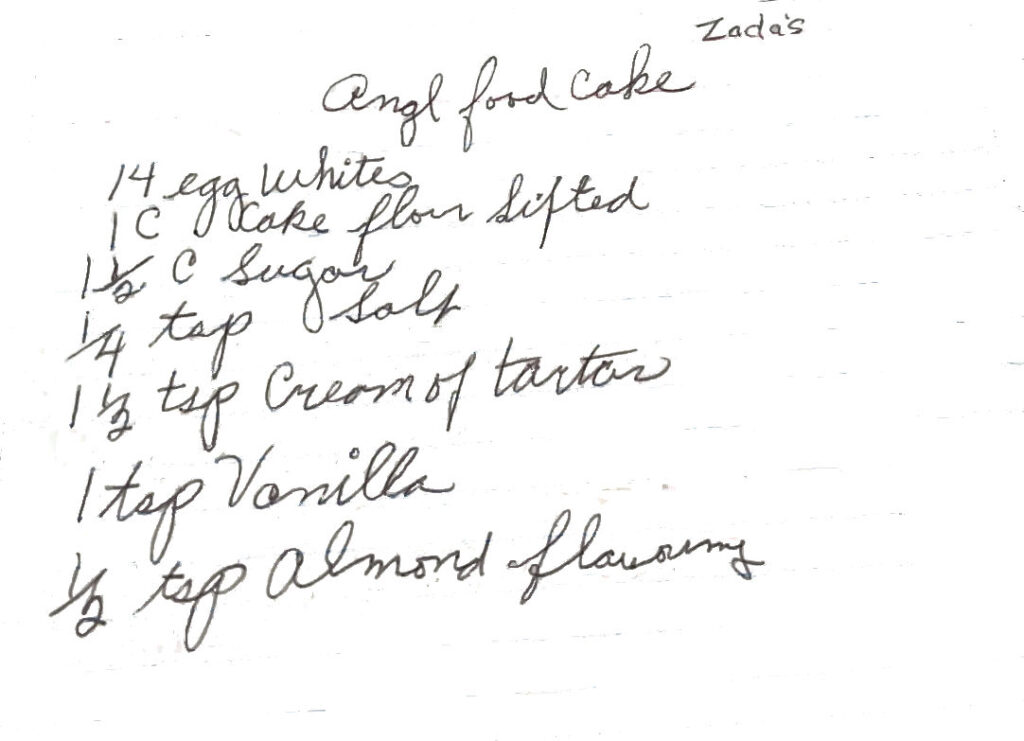
So, this is what was sent. I knew there would be a way to do this, but I was doubting myself that my husband and I could actually figure it out! Without
–
Step one: Clean up the file
The very first thing that I did was upload the picture file into my editing software. I use Paintshop Pro, but it seems like most people I talk to use Photoshop. I am not a graphic artist and will never ever claim to know what I’m doing. But I knew that I needed to erase the background on the recipe card. I did get the job done. However, the way I did this, I’m very certain, was totally not the right, nor easiest, way to accomplish this.
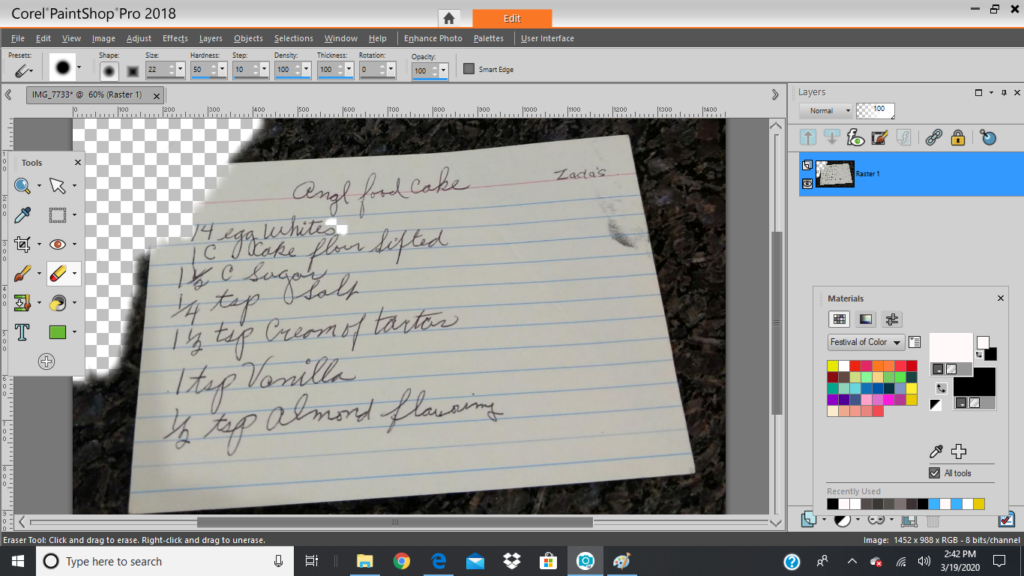
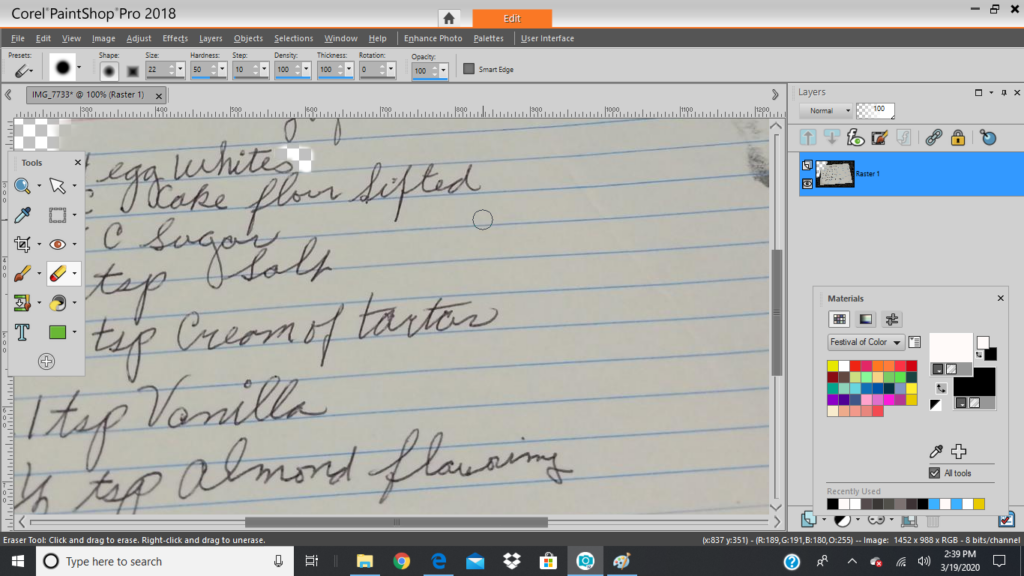
I literally just used the “background eraser” tool and slowly erased the background. Please, if anyone smarter than me knows of a more efficient way of doing this job, please tell me! Comment below or send me a message on IG or something – ANYTHING! This took me about two nights of staying up after the kids went to bed to finish. It took FOREVER. I would zoom in and very carefully erase the background around each and every letter. But in the end, it looked pretty cleaned up and I was satisfied. It was by no means perfect, but it worked. Here’s how it came out:
Step two: Convert the image to an SVG file
For me, this part was the easiest. I just uploaded the file into DesignSpace and converted it to an SVG file.
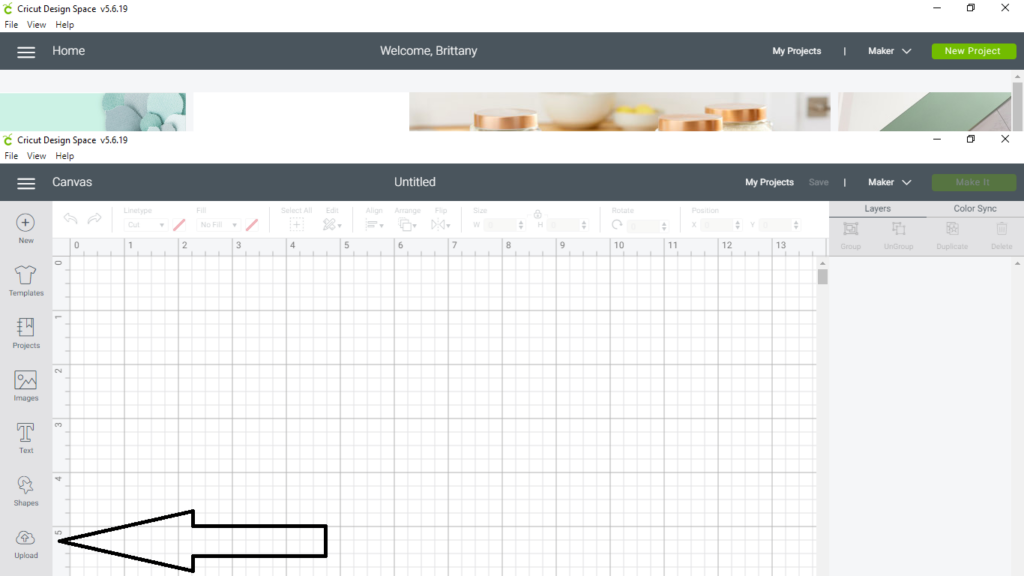
Open up DesignSpace (or whatever program you use), and click ‘Upload’.

When it asks you to select the image type, choose ‘Simple’.
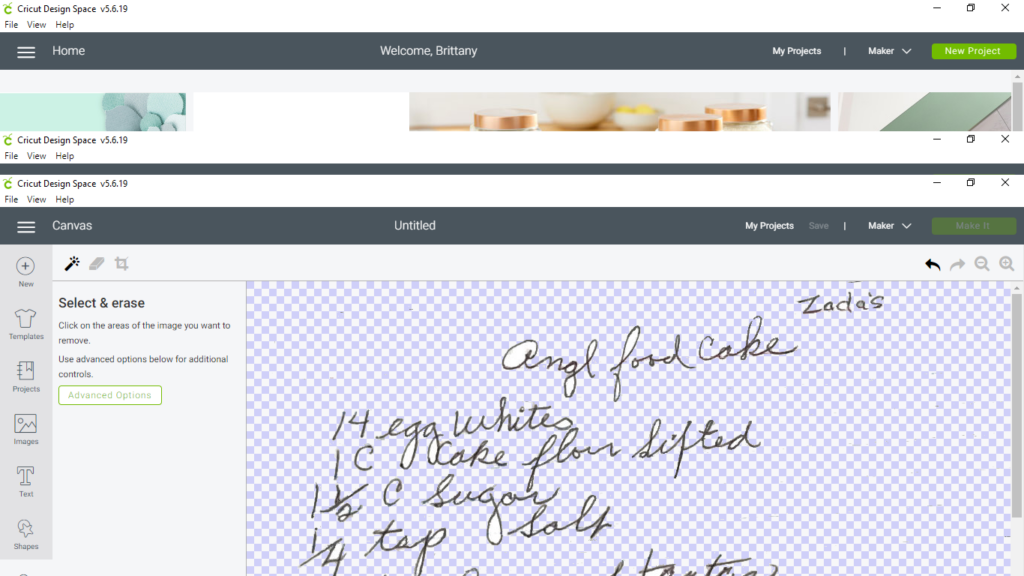
Now it will ask you to click all the parts of the image you want to erase (Yes, MORE erasing!). Make sure you click all of it, even inside the letters.
–
Step three: Cut it out
After your file is ready, load your vinyl into your cutting machine and cut out your design to the size you need.
–
Side note, I decided not to include screenshots of this part of the process. To be perfectly honest, I’m a bit of a Cricut newb and cutting things out often takes me about five times to get right. I either get the sizing wrong, the settings wrong, or something. It’s usually a bit of a disaster. So, please, if you’re struggling with this step, you may need to seek out a more reliable source to get your settings right. I’ve found that every single brand of vinyl needs different settings and it’s a bit of trial and error and I’m so not good at it. But here is the goal, we need the words to be cut out as CLEANLY as possible so that when you remove the rest of the vinyl off the backing, they look as crisp as possible. Make sense?
–
Step four: Weed the vinyl
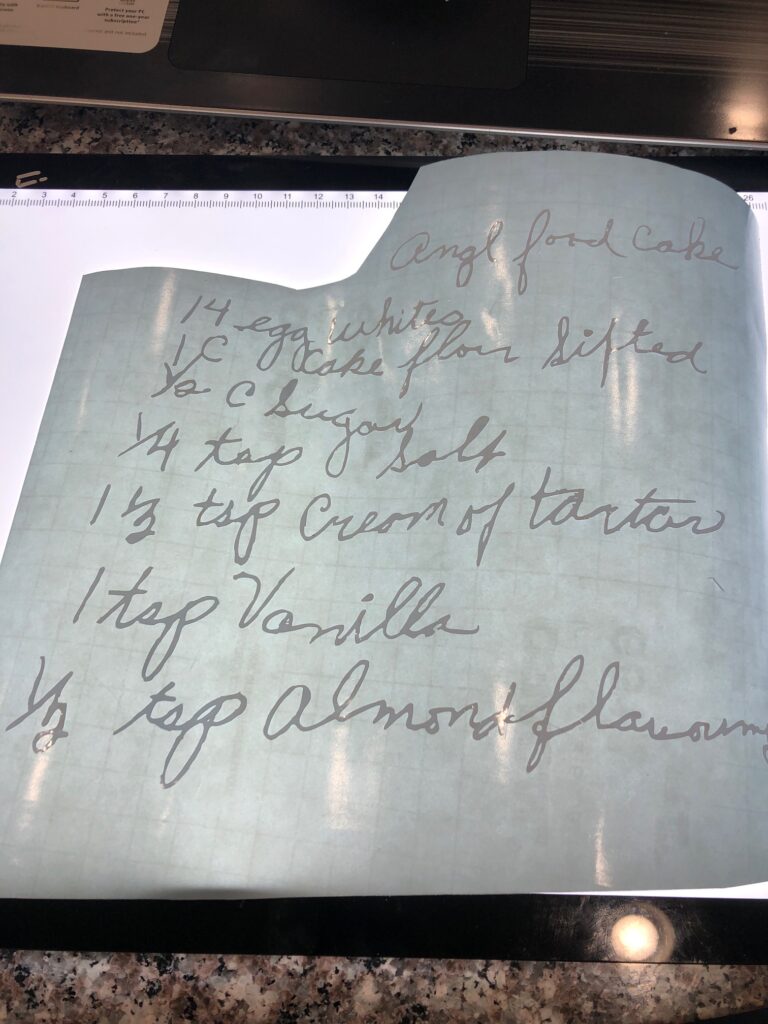
I use a light board for my weeding, but it’s not necessary. I just find it easier. The important part is to make sure you remove not only all of the extra vinyl around the words, but also all the little tiny bits inside the letters. There are lots of different tools available to do this job, but my favorite one is the weeder that came with the Cricut Basic Tool Set.
–
Step five: Apply the transfer tape to your vinyl and place your wording on the wood.
Okay, full disclosure about this step: In the midst of all the craziness of the Christmas season, my brain mostly stopped working. This step is a great illustration of this because I completely forgot to take a picture of both applying the transfer tape AND applying the vinyl to the wood. Total goof-up. But rest assured, it’s truly easy to do.
–
The type of transfer tape you wish to use is up to you. I bought a giant
–
Basically, peel the clear, sticky part of the transfer tape off the backing and very gently place it over the top of your vinyl design. Now press it down very well, if you have a credit card, or even better, a tool like the Cricut Scraper, run it all over your design so that the transfer tape is very stuck to the design. Now, very, very slowly, begin to pull up on the transfer and tape and your design should come along with it. If it’s not stuck to the transfer tape enough, put the transfer tape back down and try again.
–
After you’ve removed the transfer tape, with your design attached, design how you’d like your design placed on the piece of wood, and then very carefully, press it down onto the wood. Then use the scraper again to go over the transfer tape to ensure that the vinyl is
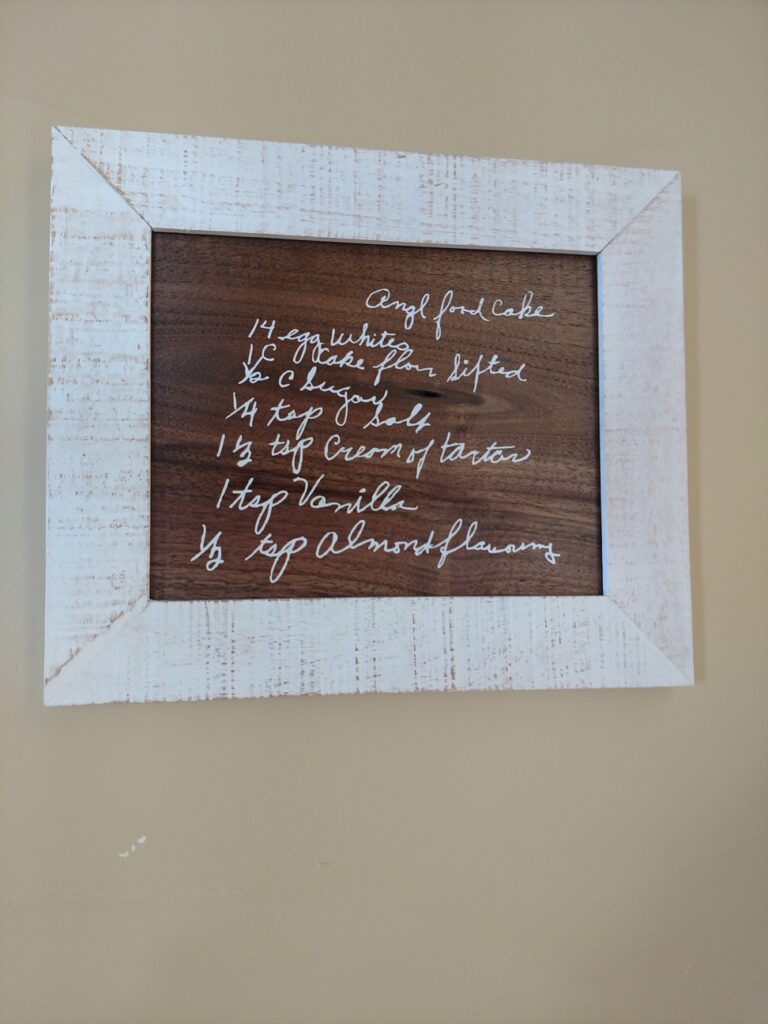
Finally, we chose to do two layers of clear polyurethane over the wood after we applied the vinyl just to seal it up nicely. This step is totally optional but I think it gives it a nice, finished look. My husband was able to get a piece of walnut wood from the farm his mom grew up on and cut to the right size and thickness, then sanded and smoothed it to perfection. That wood was truly one of the best parts of this project and I was so thankful we could use it. However, the possibilities are endless of what kind of wood you can choose!
–
And there you have it! We’re done! We finished it out by placing it in a white-washed frame. This is a super fun project because you can play with different types of wood, different colored frames, and different colors of vinyl. I also think this would look cool on a chalkboard background!
–
Happy DIYing!
